Real Name: Bruno Horgan
Identity/Class: Human technology user, citizen of the United States
Occupation: Criminal, formerly industrialist
Group Membership: Scourge's victims, formerly "Defenders" (Batroc the Leaper/Georges Batroc, Beetle/Abner Jenkins, Blob/Fred J. Dukes, Boomerang/Frederick Myers, Electro/Maxwell Dillon, Joe the Gorilla, Leap-Frog, Libra (android), Looter, Pecos, Plantman (simuloid), Porcupine/Alex Gentry, Sagittarius (android), Shocker/Herman Schultz, Toad/Mortimer Toynbee, Whirlwind/David Cannon), Justin Hammer's lieutenants (Beetle/Abner Jenkins, Blizzard/Gregor Shapanka, Constrictor/Frank Schlichting, Discus/Timothy Stuart, Leapfrog/Vincent Patillo, Man-Killer/Katharina Luisa van Horn, Porcupine/Alexander Gentry, Spymaster, Stiletto/Tom Stuart, Water Wizard/Peter van Zante, Whiplash/Mark Scarlotti), Masters of Evil (Black Knight/Nathan Garrett, Enchantress/Amora, Executioner/Skurge, Radioactive Man/Chen Lu, Wonder Man/Simon Williams, Baron Heinrich Zemo), Ultron's Masters of Evil (Black Knight/Dane Whitman, Crimson Cowl/Ultron-5, Klaw/Ulysses Klaw, Radioactive Man/Chen Lu, Whirlwind/David Cannon), Melter's Death Squad (Man-Bull/William Taurens, Whiplash/Marco Scarlotti)
Affiliations: Mrs. Bambi Arbogast, Benny, Black Lama, Franz Gruber, Libra, Keegan, Clyde Wyncham of Earth-1219
Enemies: Avengers, Bethany McCabe, Defenders, Liberators, Scourge, Human Torch (Johnny Storm), X-Men (Cyclops/Scott Summers, Iceman/Bobby Drake)
Known Relatives: Unidentified wife (divorced)
Aliases: "The mysterious Melter"
Base of Operations: New York City, New York;
formerly a lighthouse, Montauk Point, Long Island;
formerly the Crimson Cowl's hideout, New York;
formerly Queens, New York
First Appearance: Tales of Suspense I#47/1 (November, 1963)
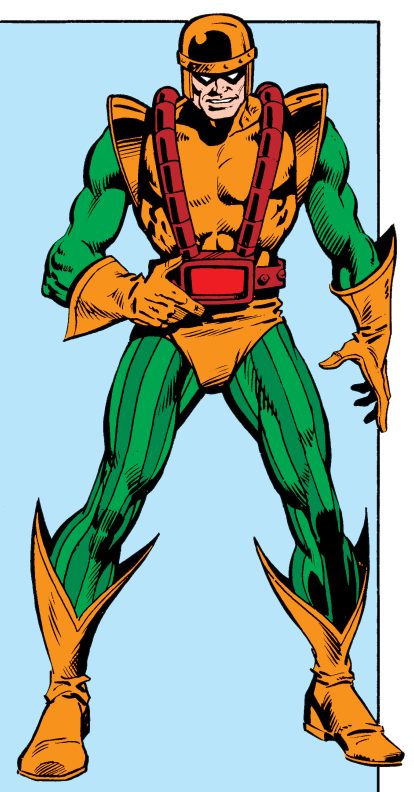
Powers/Abilities: The Melter possessed no known superhuman abilities. He was a skilled electrical engineer, a slightly above average athlete and a proficient hand-to-hand combatant. The five studs on his helmet could emit lasers.The Melter's original melting ray was a magnetic induction field device that only affected iron by loosening the binding forces of iron atoms. Baron Heinrich Zemo improved on the initial design, allowing it to affect all metal. The Mark II version of the melting ray, constructed by Tony Stark, had four settings that could affect flesh, stone, wood and metal. Melter later made a belt-version of the weapon. The Melter's battery-powered handgun had an effective range of 300 yards and could operate for several hours before it needed recharging. On a full charge the ray could 'melt' about 20 cubic feet of material. Both the gun and belt versions of the melting ray could only affect one type of material at the time. On occasion, Melter has worn a jet propelled belt that lets him fly short distances.
Height: 6'0"
Weight: 205 lbs.
Eyes: Brown
Hair: Brown
History:
(Official Handbook of the Marvel Universe I#7) - Bruno Horgan was born
in Queens, New York.
(Official Handbook of the Marvel Universe I#7) - Bruno Horgan was
married and divorced.
(Tales of Suspense I#47/1 (fb)) - Bruno Horgan made a
career as an industrialist. Not averse to cutting corners, he used
inferior materials. When his competitor Tony Stark blew the whistle on
him, Horgan lost his lucrative contract with the United States army to
Stark Industries.
(Official Handbook of the Marvel Universe
I#7) - Driven to financial ruin, Horgan was forced to dismantle his
factory and research facilities.
(Tales of Suspense I#47/1 (fb) - BTS) - Horgan also used inferior parts
to build his own lab.
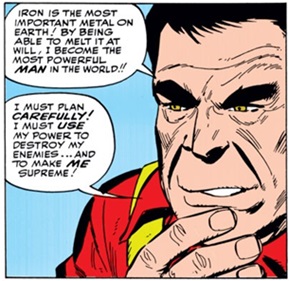
(Tales of Suspense I#47/1 (fb)) - Horgan discovered that a faulty
industrial inspection beam in his laboratory was somehow causing the
iron it hit to melt instantly. Fascinated by the opportunities this
offered, Horgan studied the device and over the course of several days,
he fit it into a compact, portable unit. In Horgan's mind, having the
power to melt iron was going to make him the most powerful man in the
world. He devised a costume for himself and embarked on a life of crime
as the Melter.
(Tales of Suspense I#47/1 (fb) - BTS) - Over the course of several
weeks, the Melter sabotaged Stark Industries by severely weakening the
metal used for their tanks. As a result, the company's reputation
suffered, leading Tony Stark to start inspecting every shipment himself.
(Tales of Suspense I#47/1) - The Melter caught Stark by surprise during
one of these inspections and knocked him out. Feeling he had now free
reign of Stark Industries, the Melter infiltrated the power plant. Just
as he was melting the generators, he was opposed by Iron Man, who was
shocked when the villain's mysterious chest beam instantly melted off
his armor's left arm. Fearing for his life-preserving chestplate, Iron
Man was forced to retreat, covering his tracks by bursting one of the
plant's main steam pipes.
(Tales of Suspense I#47/1 - BTS) - Tony Stark secretly constructed an
Iron Man armor out of aluminum.
(Tales of Suspense I#47/1) - The Melter spotted Iron Man working hard to
get Stark Industries operational again. He went in to finish the job,
but soon found his foe was now immune to his iron melting beam because
of the aluminum armor. Scared of being apprehended, the Melter escaped
into the sewers.
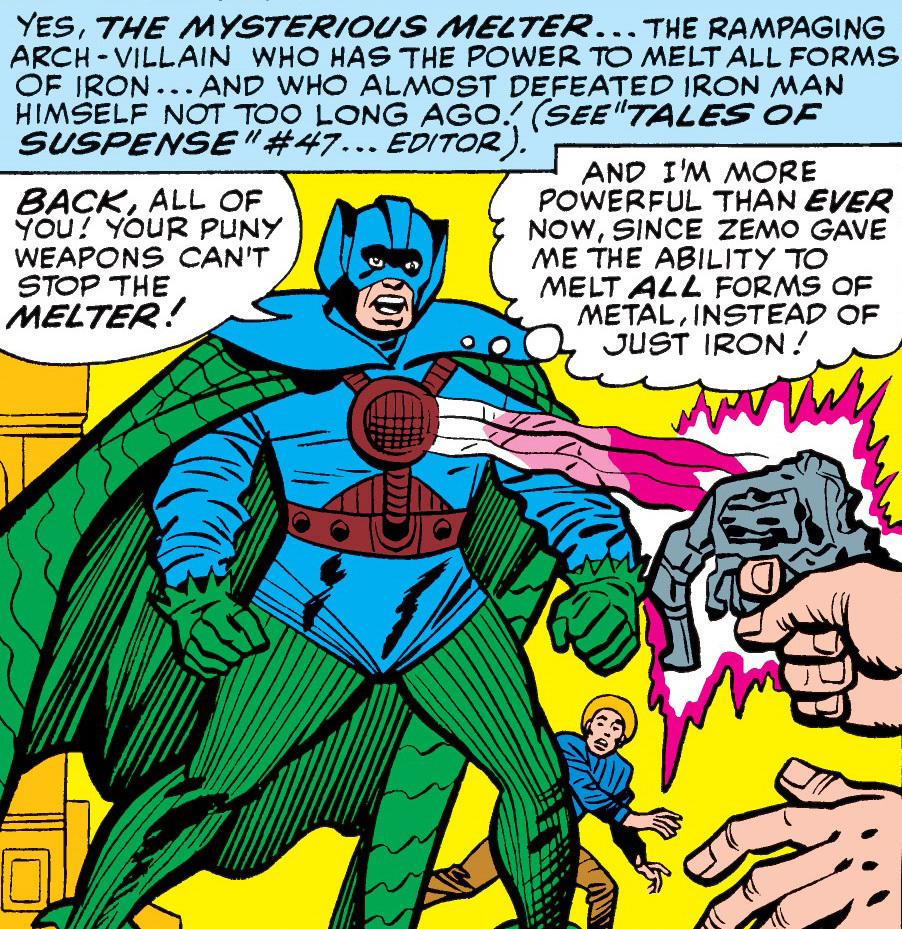
(Avengers I#6 (fb) - BTS) - The Melter was sought out by Baron Heinrich
Zemo's assistant Franz Gruber to join the Masters of Evil alongside the
Black Knight and the Radioactive Man. Zemo improved the Melter's weapon,
allowing it to affect all forms of metal instead of just iron.
(Avengers I#6) - Zemo ordered Melter, Black Knight and Radioactive Man
to cause mayhem in New York City using the superglue Adhesive X. After
melting the guns of some policemen, the Melter glued several bystanders
to the now sticky streets and then rushed to aid the Radioactive Man,
who was facing the Avengers alone. Wasp distracted the villain long
enough for Iron Man to rescue Giant-Man and Captain America, who had
become stuck as well.
(Avengers I#6 - BTS) - The Avengers retreated and contacted Paste Pot
Pete, who provided them with a solvent strong enough to counter Adhesive
X.
(Avengers I#6) - Zemo sent the Masters out with more Adhesive X, but the
Avengers were ready for them.
(Avengers: Earth's Mightiest Heroes I#3) - Melter got nervous when
he witnessed how the Radioactive Man was easily taken out of the fight.
He panicked when Iron Man attacked.
(Avengers I#6) - Hoping his improved chest beam could defeat his
opponent, Melter sent a melting lamppost against his foe. Iron Man
easily dodged and then tricked the villain into hitting a nearby fire
hydrant with his ray. Melter was knocked unconscious by the waterspout
and delivered to the police by Iron Man.
(Marvels I#2) - Photojournalist Phil Sheldon was on the job when the
Masters attacked the city; he snapped pictures of Iron Man dragging the
Melter away.
 (Avengers I#15 (fb) - BTS) - The Melter and the Black Knight were
captured and kept in the same specially prepared police cell.
(Avengers I#15 (fb) - BTS) - The Melter and the Black Knight were
captured and kept in the same specially prepared police cell.
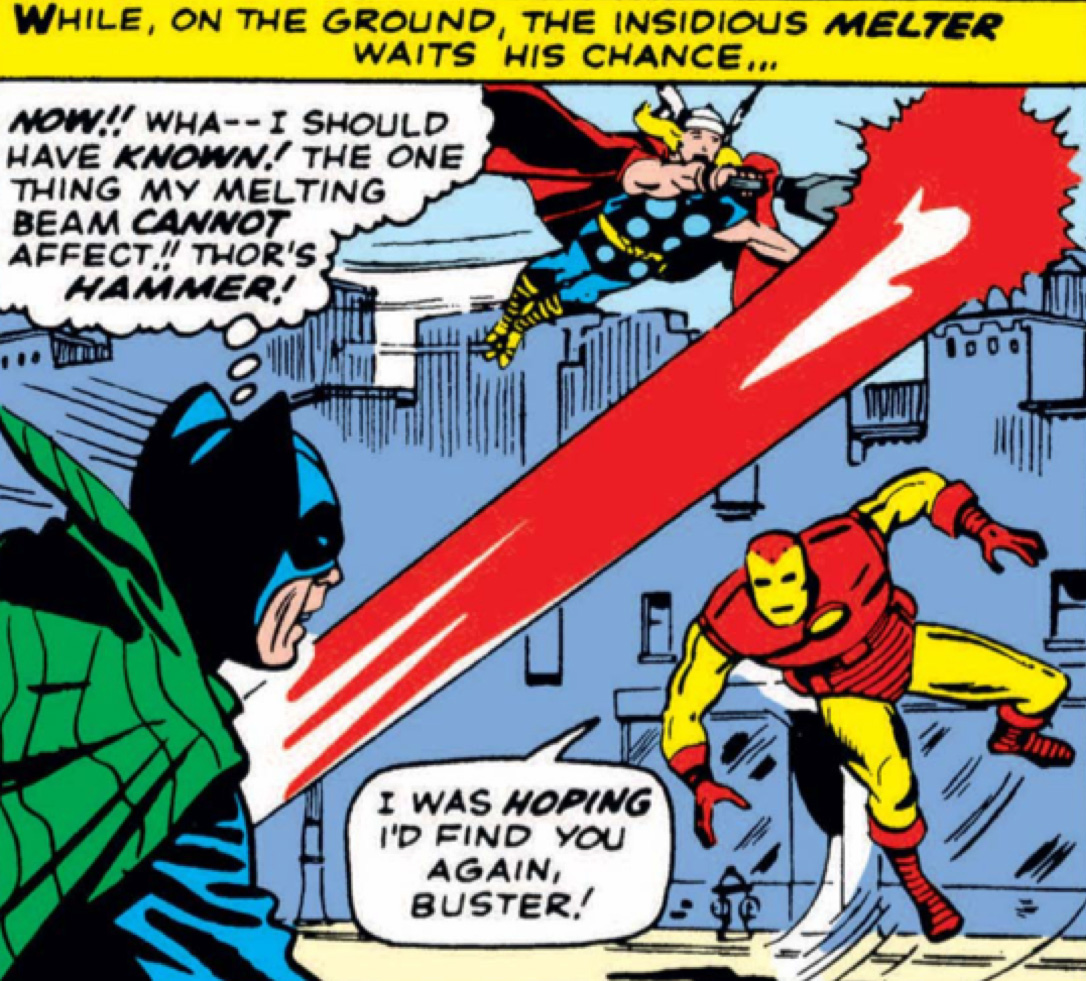
(Avengers I#15) - Acting on orders from Zemo, the Enchantress and the
Executioner freed the Melter and Black Knight. After handing them their
gear, the two Asgardians sent the villains out to fight the Avengers.
During the altercation, Melter learned his ray couldn't affect the metal
in Thor's hammer. He was also unable to hit the far more maneuverable
Iron Man. In the end, the fight between the Masters and the Avengers
reached a standstill.
(Avengers VII# 1.1) - As soon as the fighting resumed, Thor hit Melter
in the face with his hammer. Furious and determined not to return to
jail, the Melter turned his ray on full blast, threatening to melt the
city.
(Avengers I#16) - Thor used his hammer's dimensional warping abilities
to teleport the Melter and the Black Knight to a different dimension.
Furious and beyond reason, the villains swore to kill the heroes but
soon found out they had been taken to a dimension where certain natural
laws were reversed, effectively making it impossible for them to fight.
They were easily overpowered and taken into custody.
(The History Of Marvels I#1) - Bruno Horgan sued the small publishing
house Marvel after they published a comic about his recent exploits as
the Melter. Horgan argued that his depiction in the story would
negatively influence the jury of his upcoming trial. The case was
dismissed when Marvel showed sufficient evidence that their stories were
always based on news reports. Marvel also never used the name 'Bruno
Horgan' in the story, leading the judge to make a landmark ruling:
anonymous costumed identities could not be libeled, as they were public
figures.
(Fantastic Four Annual I#3) - Influenced by Doctor Doom's high-frequency
Emotion
Charger, the Melter joined numerous super-villains in an attack on
the Fantastic Four just as Reed and Sue were getting married. Melter
fought Iceman and the Human Torch before Reed Richards used the sub-atronic
time-displacer he borrowed from Uatu
the Watcher to return every combatant to the immediate past, with
no memory of the event.
 (Tales of Suspense I#89/1 (fb) - BTS) - Finding himself in jail again,
Bruno Horgan spent the next year bribing his fellow inmate Benny to
bring him spare parts from the prison's machine shop, with which he
built a new melting gun.
(Tales of Suspense I#89/1 (fb) - BTS) - Finding himself in jail again,
Bruno Horgan spent the next year bribing his fellow inmate Benny to
bring him spare parts from the prison's machine shop, with which he
built a new melting gun.
(Tales of Suspense I#89/1) - After Benny brought him the final piece,
Horgan melted the bars of the cell. He then knocked out Benny and left
him behind, figuring he'd served his purpose. After freeing himself, he
set out to retrieve a costume he'd hidden.
(Fantastic Four I#405) - Zarrko the Tomorrow
Man used his control over time to yank the unwitting Melter forward to
his present, where he briefly joined the similarly displaced Bucky,
Toro and Dargo Ktor in opposing the Fantastic Four and their allies.
Melter fired his ray at Kristoff Vernard's armor, but missed. Moments
later, Horgan returned to his own time-frame with no knowledge of what
had just occurred.
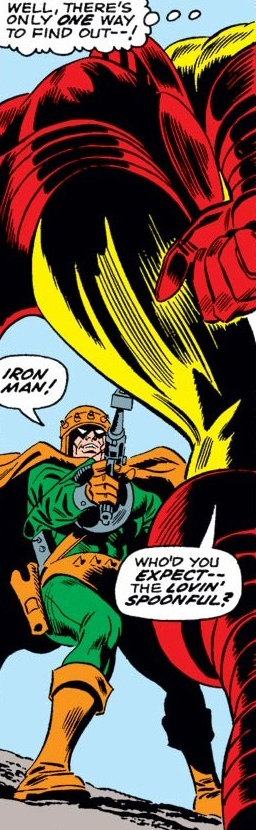
(Tales of Suspense I#89/1) - Now dressed in a new costume, the Melter
went to Stark Industries, intent on forcing Tony Stark to redesign his
handgun with the latest, most powerful transistor technology. Instead
of Stark, he found Iron Man, whom he managed to overpower with his new
gun and head-mounted laser turrets.
(Tales of Suspense I#89/1 - BTS) - Figuring he was too vulnerable as
Iron Man, Stark fled and changed out of the armor while waiting for
the Melter to come take him hostage.
(Tales of Suspense I#89/1) - Melter arrived at Stark's office and
announced he wanted a ray gun so small he could keep it hidden in his
pocket.
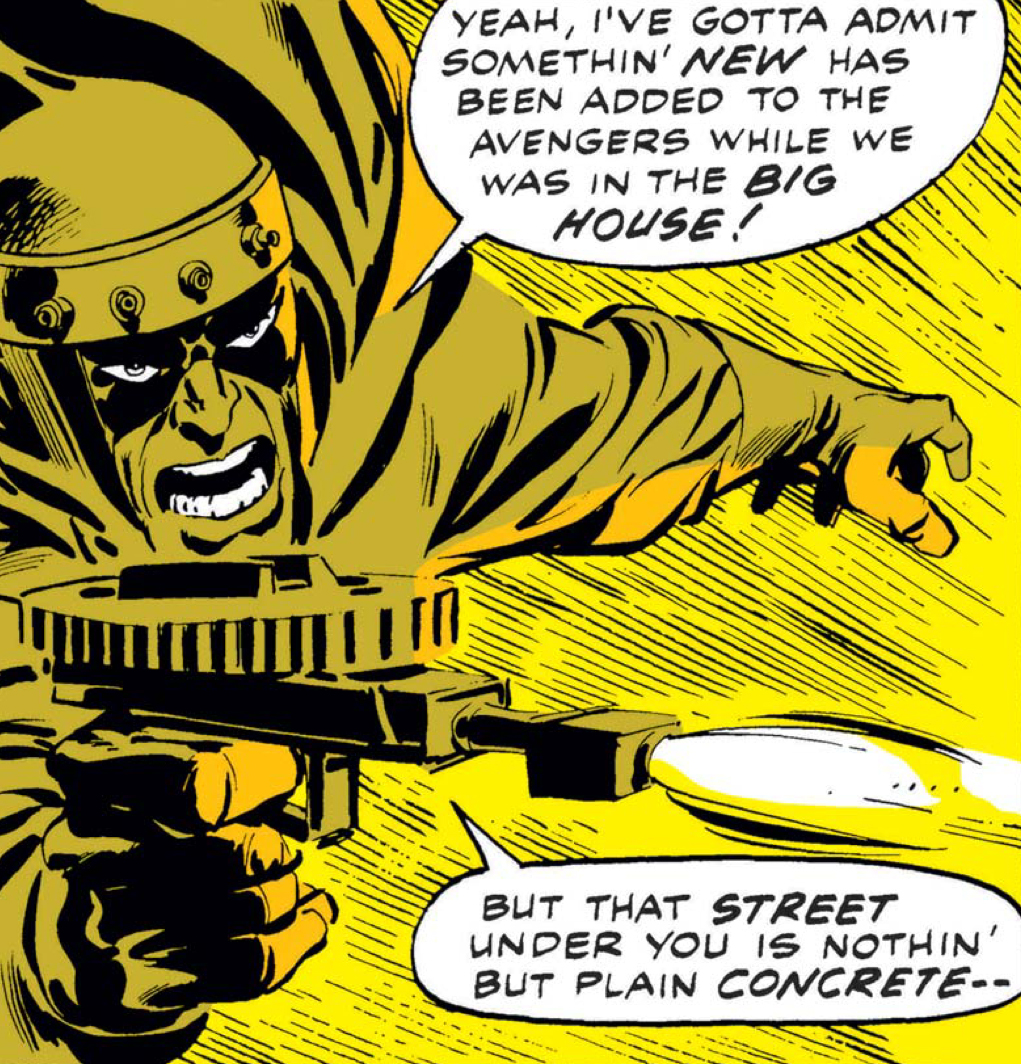
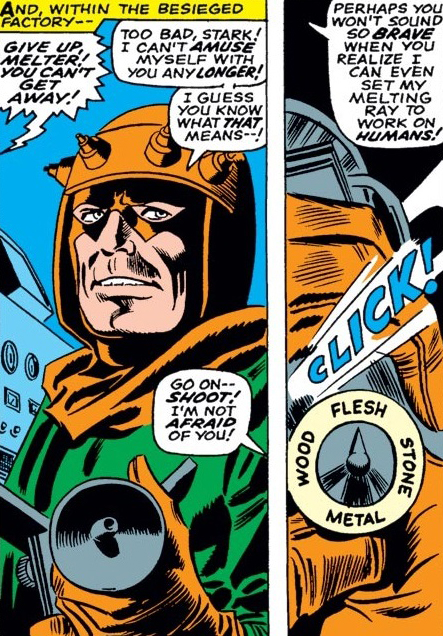 (Tales of Suspense I#90/1) - The Melter held Stark hostage in his lab,
taunting him as he forced the genius inventor to build the new gun for
him. To demonstrate his powers, Melter hit the first Iron Man armor
prototype and then revealed he could now somehow also affect other
material such as concrete. Stark further expanded the gun's abilities,
giving it four settings: metal, flesh, wood and stone. Fearing a
booby-trap, Melter forced Stark to try the gun first. When it proved
safe, Melter handed Stark his old gun, hoping he'd use it against him
because he'd set it to overload when fired; Stark didn't fall for the
ruse.
(Tales of Suspense I#90/1) - The Melter held Stark hostage in his lab,
taunting him as he forced the genius inventor to build the new gun for
him. To demonstrate his powers, Melter hit the first Iron Man armor
prototype and then revealed he could now somehow also affect other
material such as concrete. Stark further expanded the gun's abilities,
giving it four settings: metal, flesh, wood and stone. Fearing a
booby-trap, Melter forced Stark to try the gun first. When it proved
safe, Melter handed Stark his old gun, hoping he'd use it against him
because he'd set it to overload when fired; Stark didn't fall for the
ruse.
(Tales of Suspense I#90/1 - BTS) - Summoned to handle the hostage
situation at Stark Industries, police officers surrounded the plant.
(Tales of Suspense I#90/1) - When a hostage negotiator tried to reach
him via megaphone, the Melter knew it was time to go. He set his
melting gun to flesh and shot Stark in the heart, unaware that Stark
was wearing a metallic chestplate to protect his damaged heart. Melter
left Stark Industries, easily fighting off the police and arrogantly
boasting about his new power. He was shocked to find the original,
golden Iron Man was now following him. Melter kept firing his gun
until it overloaded, which was part of Stark's plan. Now powerless, he
was taken to jail even as Iron Man destroyed both the old and new
melting guns.
(Avengers I#54 (fb) - BTS) - Ultron-5, posing as the Crimson Cowl,
freed the Melter from jail and helped him restore his weaponry. To
show his gratitude, the Melter agreed to join the Cowl's new Masters
of Evil.
(Avengers I#54) - The Melter and his fellow Masters were suspicious
when Edwin Jarvis showed up at their hideout to deliver detailed
schematics of the Avengers' new security measures. Eager for action,
the Melter and the others were ready to attack. But the Cowl urged
caution, first taking out Jarvis with some knock-out gas. A few hours
later, the Melter and the other Masters realized the new Black Knight
(Dane Whitman) was about to betray them to the Avengers--they managed
to subdue him, but his flying horse escaped. This didn't keep the
Masters from carrying out the Cowl's plan. Thanks to Jarvis' intel,
the Melter was able to blast his way into Avengers Mansion where he
faced and defeated Hawkeye.
(Avengers I#55 - BTS) - Melter delivered Hawkeye to the Cowl's
scoutship. By then, the other Masters had captured Goliath, Black
Panther and Wasp as well
(Avengers I#55) - The Melter and the other Masters went along with the
Cowl's plan of placing the Avengers in a giant hydrogen bomb he
intended to use to blackmail New York City--even if the city paid the
ransom money, they'd drop the bomb in the ocean and still get rid of
the heroes. The Melter was briefly taken aback when the Cowl revealed
himself to be the robot Ultron, but he dutifully continued to obey
him. Melter was tasked to dispose of Jarvis, but the butler managed to
get away. Melter fired his gun and caused Jarvis to be buried under
some debris.
(Avengers I#55 - BTS) - The injured Jarvis managed to contact the
Black Knight and inform him of the Masters plans.
(Avengers I#55) - Melter and the others couldn't prevent Black Knight
from using his power lance to free the Avengers. The Melter was no
match for the assembled heroes, and after Goliath knocked him and the
others out, he was returned to jail.
 (Avengers I#83 (fb) - BTS) - Klaw engineered a prison break for
himself, Melter and Radioactive Man. Joining up with Whirlwind, they
hatched a scheme to kidnap famous mathematician Professor
T.W. Erwin and his Parallel-Time
Projector. Learning that Irwin was scheduled to participate in
the annual Halloween parade in Rutland, Vermont, the Masters went there
and hid out until the night of the parade.
(Avengers I#83 (fb) - BTS) - Klaw engineered a prison break for
himself, Melter and Radioactive Man. Joining up with Whirlwind, they
hatched a scheme to kidnap famous mathematician Professor
T.W. Erwin and his Parallel-Time
Projector. Learning that Irwin was scheduled to participate in
the annual Halloween parade in Rutland, Vermont, the Masters went there
and hid out until the night of the parade.
(Avengers I#83) - Joining the parade, Melter and the others forced
their way to Professor Irwin. They were opposed by the Avengers, who
also happened to be in attendance. The heroes instantly realized the
villains weren't simply people playing dress-up. Melter managed to get
the drop on the Vision by covering him in melting tar, making the
android afraid he might damage his internal systems if he started to
shift through it. Melter's concentration was broken by the Wasp, who
arrived with the rest of the Lady Liberators. The all-female team made
short work of the Masters.
(Iron Man I#72 (fb) - BTS) - Deciding to form his own team, the Melter
recruited Whiplash and the Man-Bull. Unofficially calling themselves
the Death Squad, they planned to rob the San Diego Comic Con.
(Iron Man I#72) - During the heist, they ran into the real Iron Man.
The fight was interrupted by the mysterious Black Lama who offered the
villains a Golden Globe of Power if they managed to defeat the
Avenger. The Lama also mentally manipulated the convention goers to
attack. Though he proved no match for Iron Man, the Melter did manage
to make the Black Lama leave after one of his melting blasts caused
the villain's cloak to catch fire.
(Iron Man I#92 (fb) - BTS) - Setting himself up in an abandoned
lighthouse on Long Island, the Melter worked to improve the strength
of his ray until he was convinced it made him 'stronger than a handful
of H-bombs'. When he learned the military was about to move a
prototype tactical nuclear weapon through New York, he planned to
capture it and use it to collect millions in ransom money.
(Iron Man I#92) - Melter hijacked the convoy on the Brooklyn Bridge,
easily breaching the truck that carried the nuke. He was opposed by
Iron Man, who soon found he had no defense against the Melter's new
weapon. Within five minutes, the villain had fused and destroyed Iron
Man's armor, forcing the hero to let himself fall off the bridge to
safety. Elated by this victory, the Melter used his rocket belt to
blast off with the tactical nuke.
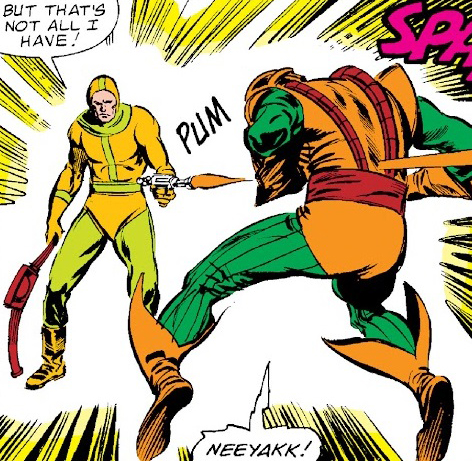
(Iron Man I#92 - BTS) - Iron Man survived and tracked down the Melter
to his Montauk base. He prepared a mechanized version of his original
armor to go in first.
(Iron Man I#92) - The Iron Man robot barged into the Melter's base
just as Horgan was negotiating with the military about the 6 million
he wanted in return for the nuke. Unaware he was facing a robot,
Melter panicked when Iron Man kept coming at him, even after losing an
arm. Distracted, the villain was vulnerable to an attack from Stark in
a more recent Iron Man suit. Melter was so crazed and confused he fell
from the top of the lighthouse into the bay, quickly disappearing
under the waves.
(Defenders I#64 (fb) - BTS) - Melter and numerous other villains were
recruited by the android Zodiac members Libra and Sagittarius to take
part in a convoluted scheme to help 'correct an imbalance' caused by
the Defenders defeating their fellow Zodiac member Scorpio.
The two androids sent the villains on a crime spree posing as members
of the Defenders.
(Defenders I#64) - Libra took Melter, Boomerang, Toad, Joe the
Gorilla, Shocker, Pecos Joe and Batroc the Leaper to rob the New York
Stock Exchange. When the real Defenders arrived, Melter quickly took
down Nighthawk
with his chestbeam. In the end, all the villains were all defeated by
Valkyrie
alone, who was in the grip of warrior madness.
(Iron Man I#123 (fb) - BTS) -
Melter entered the employ of businessman Justin Hammer, who had
gotten into the habit of bankrolling super-villains in return for
their services.
(Iron Man I#123) - Acting on Hammer's orders, Melter, Blizzard and
Whiplash went to Atlantic City to rob a casino. They made short work
of the guards and easily broke open the titanium steel vault, but
accidentally tripped an alarm that not only alerted a large
contingent of guards, but also Tony Stark, who happened to be at the
casino as well. Melter soon faced his old enemy again and found the
armored Avenger was now impervious to his melting beam. However,
when he combined his blasts with Blizzard's cold beam, they brought
their opponent to his knees.
 (Iron Man I#124) - Before Whiplash could finish off the weakened
hero, Bethany McCabe stepped in by shooting the villain's
electro-whip. This allowed Iron Man enough time to recover. He
quickly knocked out Melter, which led Blizzard to encase himself in
a suit of icy armor to take the fight to Iron Man, who laughed off
the attack before knocking him out with a punch and a repulsor
blast.
(Iron Man I#124) - Before Whiplash could finish off the weakened
hero, Bethany McCabe stepped in by shooting the villain's
electro-whip. This allowed Iron Man enough time to recover. He
quickly knocked out Melter, which led Blizzard to encase himself in
a suit of icy armor to take the fight to Iron Man, who laughed off
the attack before knocking him out with a punch and a repulsor
blast.
(Iron Man I#124 - BTS) - Melter and the others were arrested and
taken to jail.
(Iron Man I#126 (fb) - BTS) - Justin Hammer had Melter,
Blizzard, and Whiplash freed from Ryker's Island.
(Iron Man I#126) - Justin Hammer welcomed Melter and the other two
villains to his floating island in the Mediterranean. Hammer had harsh
words for his hirelings, telling them he was not in the habit of funding
failures. Next time, he would not be so ready to bail them out. Melter
joined Hammer's other super powered operatives when the captive Tony
Stark set off an explosion on the island. When they rushed to the scene
of the incident, they were met by Iron Man.
(Iron Man I#127) - Hammer ordered his small army of mercenaries to
attack en masse, but they were no match for Iron Man. Melter and
Blizzard attempted to repeat the attack strategy they used on the golden
Avenger in Atlantic City. Iron Man brushed off their blasts and took
them out of the fight by banging their heads together. Blizzard
recovered in time to jump off Hammer's floating villa before Iron Man
caused it to sink.
(Iron Man I#166 (fb) - BTS) - Horgan wound up back in jail, where he
befriended a nuclear physicist who helped him redesign his melting beam
so that it could affect Iron Man's top of the line armor.
 (Iron Man I#166 (fb) - BTS) - Horgan misled the parole board, faking
model behavior so they would grant him an early release.
(Iron Man I#166 (fb) - BTS) - Horgan misled the parole board, faking
model behavior so they would grant him an early release.
(Marvel Two-in-One I#96) - The Melter was among a small army of
super-villains intent on taking out the Thing when he was recuperating
in a New York hospital after barely surviving a fight against the Elder
of the Universe known as the Champion.
They were opposed by an assemblage of heroes who made sure none of the
villains were able to reach Grimm.
(Iron Man I#166 (fb) - BTS) - Eager to have his revenge on Iron Man, the
Melter went to Stark Enterprises for a week, dutifully checking in with
Stark's personal secretary Mrs. Arbogast who didn't even flinch when the
super-villain entered the premises.
(Iron Man I#166 - BTS) - When Tony Stark returned home from London, Mrs.
Arbogast discreetly informed him about the Melter situation.
(Iron Man I#166) - Forced to put on an older model because his suit got
damaged in London, Stark faced the Melter in the lobby. The villain
boasted about his new beam, but because it was only designed to affect
the latest armor, it proved less than useful. Melter panicked and ran
off, inadvertently wrecking the place with his still active melting ray.
Iron Man was forced to knock him out.
(Marvel: 1985 I#4) - Melter, along with numerous other super-villains,
were pulled to Earth-1219 by Clyde Wyncham, that reality's sole,
all-powerful mutant. On that Earth, Melter first used his beam to kill
somebody as he watched a soldier liquefy before his eyes (see
comments).
(Marvel: 1985 I#6) - Clyde Wyncham eventually sent the Melter and the
other villains he controlled back home to Earth-616.
 (Avengers I#263 (fb) - BTS) - Operating out of a base near Avengers
Mansion, the Melter came up with a new scheme to use a new, improved
version of his melting ray to wipe out his enemies' headquarters as soon
as they were all assembled. He hired an assistant, Keegan, to help him
prepare for the moment.
(Avengers I#263 (fb) - BTS) - Operating out of a base near Avengers
Mansion, the Melter came up with a new scheme to use a new, improved
version of his melting ray to wipe out his enemies' headquarters as soon
as they were all assembled. He hired an assistant, Keegan, to help him
prepare for the moment.
(Avengers I#263 (fb) - BTS) - The Scourge of the Underworld infiltrated
Melter's hideout and killed and replaced Keegan.
(Avengers I#263) - The Melter was gleefully watching the Avengers leave
on another mission, while repeating the brilliance of his scheme to
Keegan until he stumbled on the man's lifeless body stuffed in the
locker where he kept his ray projector. Shocked, Horgan turned around
only to be shot through the stomach by the Scourge, who also stomped on
the villain's melting ray.
(Sensational She-Hulk I#53) - During her brief stint in the afterlife,
She-Hulk visited the Postmortem Mall, where seemingly deceased heroes
and villains were living their best life. The Melter was seen taking a
step aerobics class taught by the Kangaroo
at Fatal Fitness. (see comments).
 (JLA/Avengers I# 2& 3 (fb) - BTS) - When the Grandmaster used
objects of power to fuse Earth-616 with an actuality from a Divergent
Continuum, history was retroactively rewritten. Bruno Horgan still
became the Melter and joined Zemo's Masters of Evil. After an unrevealed
misadventure, the group found itself exiled to a dimensional void, stuck
in a cell constructed by Green Lantern's power ring.
(JLA/Avengers I# 2& 3 (fb) - BTS) - When the Grandmaster used
objects of power to fuse Earth-616 with an actuality from a Divergent
Continuum, history was retroactively rewritten. Bruno Horgan still
became the Melter and joined Zemo's Masters of Evil. After an unrevealed
misadventure, the group found itself exiled to a dimensional void, stuck
in a cell constructed by Green Lantern's power ring.
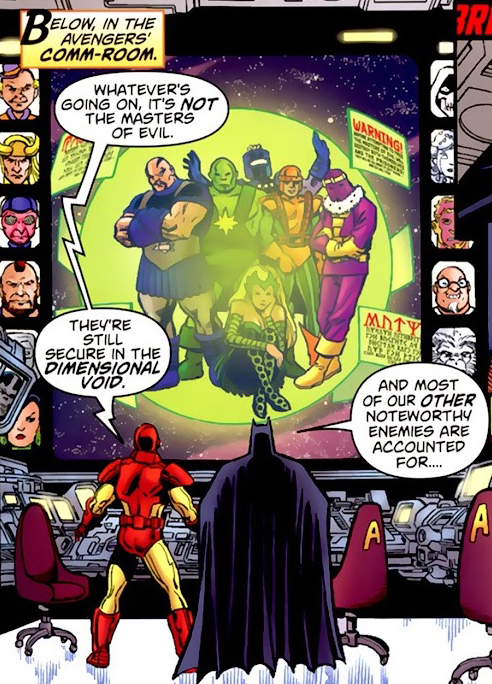
(JLA/Avengers I#3) - As soon as the Avengers and JLA started to realize
their shared reality was false and flawed, they checked on villains who
might be responsible--after inspecting the dimensional void cell, they
concluded it couldn't be the Masters of Evil.
(JLA/Avengers I#4) - When the mad Oan scientist
Krona, native to a Divergent Continuum, weakened the barriers between
Earth-616 and his home reality, the Avengers and the Justice League of
America decided to team up to restore order to this new actuality.
During the heroes' final assault on Krona's power base, the Oan summoned
dozens of villains from both universes to defend him, including the
Melter, who was seen using his melting ray on the armored hero Rocket
Red.
Comments: Created by Stan Lee, Steve Ditko, Don Heck.
Some characters are meant for greatness, others seem
destined for mediocrity. The Melter firmly belongs in the latter
category.
I guess it started with his initial costume...
Dreaming up a costume that symbolizes the power of melting
is hard to do... But something tells me Lee and Ditko could have
been a bit more creative than slapping a green tablecloth on the guy.
As it is, the Melter might be the best example of an inexplicable
super-villain. Sure, Horgan was driven to financial ruin... But why rob
banks when you have just discovered a handheld device that can melt
metal? The patents alone could have bought him an island.
On his belt, on his chest, as a handgun... The Melter never quite
figured out the best spot to put the melting beam projector. You wonder
why he never ditched those five lasers and mounted the thing on his
head. Guess he didn't want to risk the Unicorn suing him for copyright
infringement.
Even though the Melter had a setting on his weaponry for flesh, he never
came across like an out-and-out killer. That's why his portrayal as a
sadistic murderer who joyfully watches a man melt in Marvel: 1985 feels
out of character for Bruno Horgan. Either because he was influenced by
the depraved mind of Clyde Wyncham or because he was written by Mark
Millar.
Given the satirical nature of the Sensational She-Hulk series,
it's entirely possible there is no such thing as a Postmortem Mall. I've
still included the Melter's appearance there until we have definitive
proof it was all a spoof.
Melter and the other Masters of Evil appear in a one panel flashback to
the events of Avengers I#6 in Captain America: Man out
of time I#4. Because that story didn't reveal any new
information about the Melter, it wasn't included in the profile. His
appearance in Heroes & Legends 96 is excluded for the
same reason..
The Melter received full profiles in The Official Handbook of the
Marvel Universe I#7, Official Handbook of the Marvel Universe II#18 and
Official Handbook of the Marvel Universe Master Edition I#12.
Thanks to Stuart for the hi-res main image. Head shot without mask added by Ron Fredricks.
Profile by Norvo
CLARIFICATIONS:
Melter (Bruno Horgan) should not be confused with
Images: (without ads)
Official Handbook of the Marvel Universe I#7, p13, pan1 (main image)
Tales of Suspense I#47, p3, pan5 (headshot -
Bruno Horgan)
Avengers I#6, p6, pan1 (with the Masters of Evil)
Avengers I#15, p17, pan4 (unable to melt Thor's hammer)
Tales to Astonish I#89, p9, pan3 (new costume)
Tales of Suspense I#90, p7, pans1&2 (Melter's new gun controls)
Avengers I#83, p10, pan5 (versus Vision)
Iron Man I#127, p7, pans2&3 (taken out with Blizzard)
Iron Man I#166, p8, pan1(forgot about repulsors)
Avengers I#263, p12, pan7 (killed by Scourge)
JLA Avengers I#3, p15, pan1 (stuck in dimensional void)
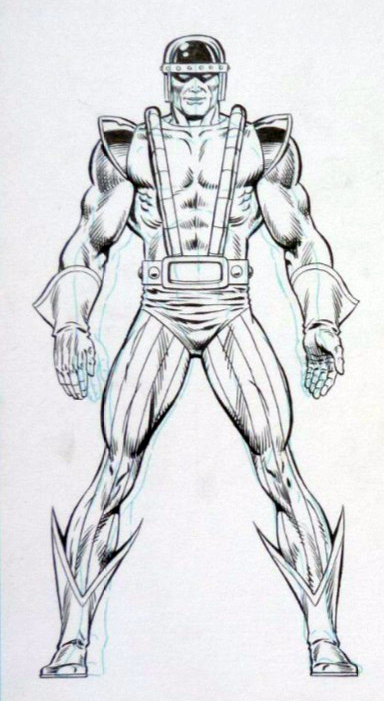
Official Handbook of the Marvel Universe Master Edition I#12, p8, pan1
(master handbook)
Appearances:
Tales of Suspense I#47 (November, 1963) - Stan Lee (writer/editor),
Steve Ditko (pencils), Don Heck (inks)
Avengers I#6 (July, 1964) - Stan Lee (writer/editor), Jack Kirby
(pencils), Chic Stone (inks)
Avengers I#15 (April, 1965) - Stan Lee (writer/editor), Jack Kirby &
Don Heck (pencils), Mike Esposito (inks)
Avengers I#16 (May, 1965) - Stan Lee (writer/editor), Jack Kirby
(pencils), Dick Ayers (inks)
Fantastic Four Annual I#3 (October, 1965) - Stan Lee (writer/editor),
Jack Kirby (pencils), Vince Colletta (inks)
Tales of Suspense I#89 (May, 1967) - Stan Lee (writer/editor), Gene
Colan (pencils), Frank Giacoia (inks)
Tales of Suspense I#90 (June, 1967) -
Stan Lee (writer/editor), Gene Colan (pencils), Frank Giacoia (inks)
Avengers I#54 (July, 1968) - Roy Thomas (writer), John
Buscema (pencils), George Tuska (inks), Stan Lee (editor)
Avengers I#55
(August, 1968) - Roy Thomas (writer), John Buscema (pencils),
George Klein (inks), Stan Lee (editor)
Avengers I#83 (December, 1970) - Roy Thomas (writer), Sal Buscema
(pencils), Tom Palmer (inks), Stan Lee (editor)
Iron Man I#72 (January, 1975) - Barry Alfonso & Mike Friedrich
(writers), George Tuska (pencils), Vince Colletta (inks), Roy Thomas
(editor)
Iron Man I#92 (November, 1976) - Gerry Conway
(writer/editor), George Tuska (pencils), Jack Abel (inks)
Defenders I#64 (October, 1978) - David Anthony Kraft (writer), Sal Buscema
(pencils), Don Perlin (inks), Bob Hall (editor)
Iron Man I#123
(June, 1979) - David Michelinie & Bob Layton (writers), John
Romita Jr. (pencils), Bob Layton (inks), Roger Stern (editor)
Iron Man I#124 (July, 1979) - David Michelinie & Bob Layton
(writers), John Romita Jr. (pencils), Bob Layton (inks), Roger
Stern (editor)
Iron Man I#126 (September, 1979) - David Michelinie & Bob
Layton (writers), John Romita Jr. (pencils), Bob Layton (inks),
Roger Stern (editor)
Iron Man I#127 (October, 1979) - David Michelinie & Bob Layton
(writers), John Romita Jr. (pencils), Bob Layton (inks), Roger
Stern (editor)
Iron Man I#166 (January, 1983) - Denny O'Neil (writer), Luke
McDonnell (pencils), Steve Mitchell (inks), Jim Salicrup (editor)
Marvel Two-In-One I#96 (February, 1983) - Tom DeFalco (writer),
Ron Wilson (pencils), Mike Esposito (inks), Steven Grant (editor)
Official
Handbook of the Marvel Universe I#7 (July, 1983) - Mark
Gruenwald (writer, editor), Josef Rubinstein (inks)
Avengers I#263 (October, 1985) -
Roger Stern (writer), John Buscema (pencils), Tom Palmer (inks), Mark
Gruenwald (editor)
Official Handbook of the Marvel Universe II#18 (October, 1987) - Mark
Gruenwald (writer, editor), Josef Rubinstein (inks)
Official Handbook of the Marvel Universe Master Edition (November, 1991)
- Mark Gruenwald (writer, editor), Keith Pollard (pencils), Josef
Rubinstein (inks)
Sensational She-Hulk I#53 (July, 1993) - Michael Eury (writer), Darren
Auck (pencils), Mike DeCarlo (inks), Renée Witterstaetter (editor)
Marvels I#2 (February, 1994) - Kurt Busiek (writer), Alex Ross (pencils
& inks), Marcus McLaurin (editor)
Fantastic Four I#405 (October, 1995)
- Tom DeFalco (writer), Paul Ryan (pencils), Danny Bulanadi (inks),
Nel Yomtov (editor)
The History of Marvels (July, 2000) - Tom Brevoort
(writer), Matt Hicks (editor)
JLA/Avengers I#3 (December,
2003) - Kurt Busiek (writer), George Pérez (pencils & inks), Tom
Brevoort (editor)
JLA/Avengers
I#4 (February, 2004) - Kurt Busiek (writer), George Pérez (pencils
& inks), Tom Brevoort (editor)
Avengers: Earth's Mightiest Heroes I#3 (December, 2004) - Joe Casey
(writer), Scott Collins (pencils & inks) Tom Brevoort (editor)
Marvel: 1985 I#4 (October, 2008) - Mark Millar (writer), Tommy Lee
Edwards (pencils & inks), Jody Leheup (editor)
Marvel: 1985 I#6 (December, 2008) - Mark Millar (writer), Tommy Lee
Edwards (pencils & inks), John Barber (editor)
Avengers VII #1.1 (January, 2017) - Mark Waid (writer), Barry Kitson
(pencils), Mark Farmer (inks), Tom Brevoort (editor)
First Posted: 06/13/2024
Last Updated: 06/13/2024
Any Additions/Corrections? please let me know.
Non-Marvel
Copyright info
All other characters mentioned or pictured are ™ and © 1941-2099
Marvel Characters, Inc. All Rights Reserved. If you like this stuff, you
should check out the real thing!
Please visit The Marvel Official Site at: http://www.marvel.com
Special Thanks to www.g-mart.com for hosting the Appendix, Master List, etc.!